 Save to Pinterest
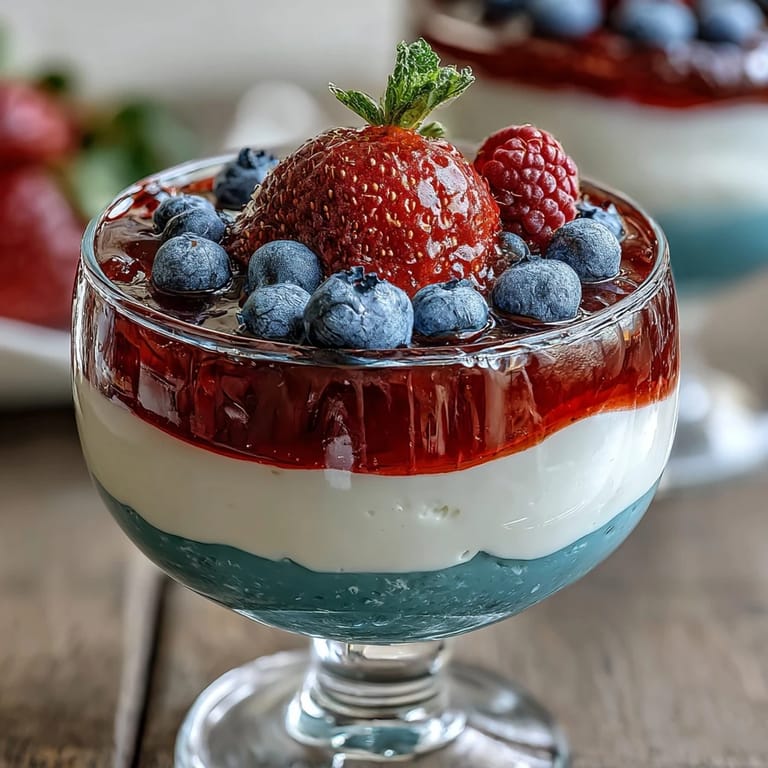
 My daughter came home from school talking about red, white, and blue everything, and I found myself at the kitchen counter on a random Tuesday afternoon, staring at three boxes of Jello and wondering if I could actually pull off something that looked this impressive. Turns out, these layered cups are less about fancy technique and more about patience and a muffin tin that holds your cups at just the right angle. What started as me trying to impress a seven-year-old turned into my go-to dessert for every summer gathering since.
I remember making a batch for the Fourth of July and watching my neighbor peek over the fence, genuinely curious about what was in those beautiful striped cups. She ended up staying for dessert, and we spent the evening talking about how the simplest things often make the biggest impact at a table. That's when I realized these weren't just Jello cups anymore.
Ingredients
- Red Layer: One 3 oz box of strawberry or cherry Jello dissolves beautifully in boiling water, and the cold water mellows it just enough so it sets with that perfect wobble.
- Boiling water for red layer: Must be truly boiling to fully hydrate those tiny granules, or you'll end up with grainy texture no matter how much you stir.
- Cold water for red layer: Stops the cooking process and brings the mixture to the right temperature for setting without scrambling anything.
- Unflavored gelatin for white layer: This is the secret weapon that makes the middle creamy instead of clear, and it needs those five minutes to bloom or it won't set properly.
- Cold water for blooming gelatin: Creates the bloom that activates the gelatin molecules and ensures smooth, lump-free results.
- Boiling water for white layer: Dissolves the bloomed gelatin completely, making the mixture silky and ready for the condensed milk.
- Sweetened condensed milk: Gives the white layer its cloud-like appearance and creamy richness that contrasts beautifully with the fruity layers.
- Blue Layer: One 3 oz box of blue raspberry Jello creates that final pop of color, and it needs the same careful mixing as the red layer.
- Boiling and cold water for blue layer: Follows the same ratio as the red to ensure consistent setting and texture across all three layers.
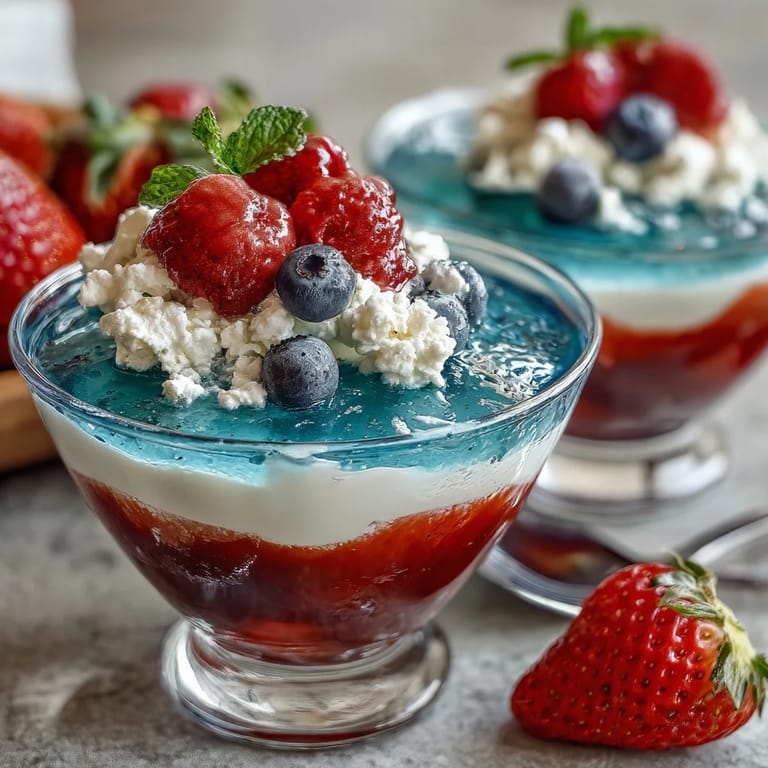
- Whipped cream and fresh berries as garnish: These aren't just pretty toppings but they add texture and brightness that balances the sweetness of the Jello.
Tired of Takeout? 🥡
Get 10 meals you can make faster than delivery arrives. Seriously.
One email. No spam. Unsubscribe anytime.
Instructions
- Set up your cups and workspace:
- Grab eight clear cups and arrange them so you have easy access to all of them at once. If you have a muffin tin, set it nearby because you'll need it to hold the cups at an angle for the first layer.
- Make the red layer:
- Pour boiling water over the strawberry or cherry Jello and stir for about two minutes until every granule dissolves completely. Add cold water and divide the mixture evenly between your cups, using about two tablespoons per cup.
- Chill the red layer at an angle:
- Place your cups into a muffin tin so they sit tilted, which creates that gorgeous angled stripe effect. Slide the tin into the refrigerator for forty-five to sixty minutes until the red layer feels firm to the touch but not rock hard.
- Prepare the white layer:
- Sprinkle unflavored gelatin over cold water in a clean bowl and let it sit untouched for five minutes, which allows the gelatin to absorb the water and bloom. Pour boiling water over the bloomed gelatin and stir until it's completely dissolved and clear, then stir in your sweetened condensed milk until smooth.
- Cool the white mixture:
- Let the white layer sit at room temperature for about fifteen minutes so it's no longer hot when you pour it onto the set red layer. This cooling step prevents the hot mixture from melting the layer beneath it.
- Pour the white layer:
- Once the red layer is set, carefully pour the white mixture over it, using about two tablespoons per cup and pouring slowly so it settles gently on top. Stand the cups upright now and return them to the refrigerator for another forty-five to sixty minutes.
- Make the blue layer:
- Dissolve the blue raspberry Jello in boiling water with the same careful stirring you used for the red layer, then add cold water. Let this cool to room temperature for about ten minutes before pouring, so you're not shocking the white layer below with heat.
- Add the blue layer and final chill:
- Gently pour the cooled blue Jello over the firm white layer, again using about two tablespoons per cup. Return the cups to the refrigerator upright for at least two hours, though overnight is even better for the layers to fully set and become properly sturdy.
- Garnish and serve:
- Top each cup with a dollop of whipped cream and scatter fresh blueberries and strawberries on top for color and a little brightness against all that sweetness.
 Save to Pinterest
 There was this moment during a neighborhood barbecue when a friend's kid pointed at the cups and said they looked like America in a glass, and suddenly everyone wanted one. That's when I realized these weren't just a fun Fourth of July dessert anymore but something that brings people together and makes them smile before they even taste it.
The Magic of Angled Chilling
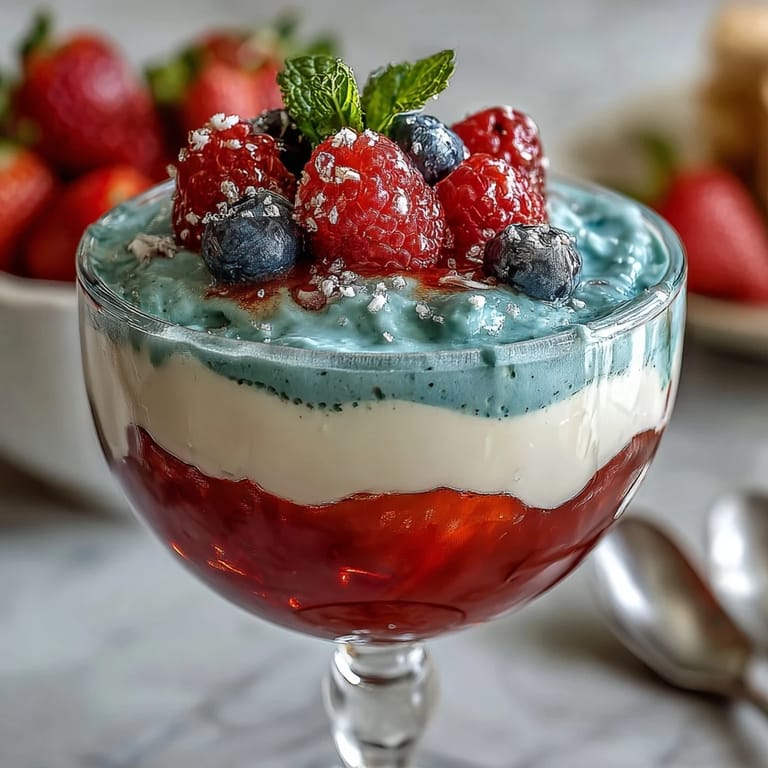
The muffin tin trick is honestly the best-kept secret of layered Jello cups, and I discovered it by accident when I ran out of counter space and started tilting cups into a muffin tin. The angle creates that gorgeous slanted stripe that makes the cup look restaurant-worthy, and people always assume it's harder to make than it actually is. Once the first layer sets, you stand the cups upright for the remaining layers, so you're only dealing with the angle for that first forty-five minutes.
Why the White Layer Is the Star
That creamy white middle is what separates these from boring fruit Jello cups, and it's made possible by combining unflavored gelatin with sweetened condensed milk. The condensed milk makes it dense and luscious while the gelatin keeps it structured, so you get this cloud-like layer that's sweet, smooth, and slightly different in texture from the fruity layers. Every person I've served these to always asks about that middle layer first, which tells you everything about how much it matters.
Timing and Patience Pay Off
I won't lie, the first time I made these I got impatient and tried to add layers before they were ready, and it was a total disaster that ended up looking like a muddy swirl. Now I've learned to set a timer for each chilling phase and actually stick to it, which means the final product looks sharp and impressive instead of blended. The beauty of this recipe is that you can make it a full day ahead, so there's no rush on the day you're serving it.
- If a layer seems soft when you touch it gently, give it another fifteen minutes rather than risking the blur.
- You can cover the cups loosely with plastic wrap between layers to keep any fridge smells out of your dessert.
- Room temperature mixing prevents any layer from melting into the one below it, which is why that cooling step matters so much.
 Save to Pinterest
 These cups have become my secret weapon for making gatherings feel special without spending hours in the kitchen. There's something about layered color and that creamy surprise in the middle that makes people happy before they even take a bite.
Recipe FAQs
- → How do I achieve clear, sharp layers?
Allow each layer to fully set in the refrigerator before adding the next to prevent colors from blending.
- → Can I substitute dairy ingredients?
For a dairy-free option, replace sweetened condensed milk with coconut milk and sugar.
- → What flavors are used for the layers?
The red and blue layers use strawberry or cherry and blue raspberry gelatin, respectively, while the white layer uses unflavored gelatin mixed with sweetened condensed milk.
- → How long should the dessert chill before serving?
After assembling all layers, chill the cups for at least 2 hours to ensure the blue layer is fully set.
- → Can the berry flavors be swapped?
Yes, red and blue gelatin flavors can be swapped to your preference for a customized taste.
- → What tool helps set the cups at an angle?
A muffin tin can be used to hold cups at a slight angle while chilling the first layer.