 Save to Pinterest
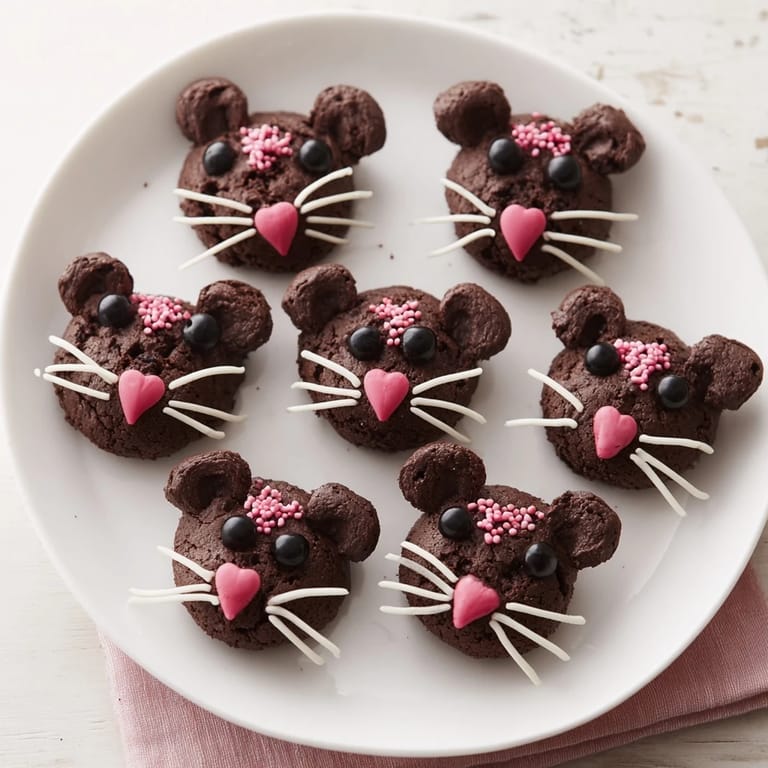
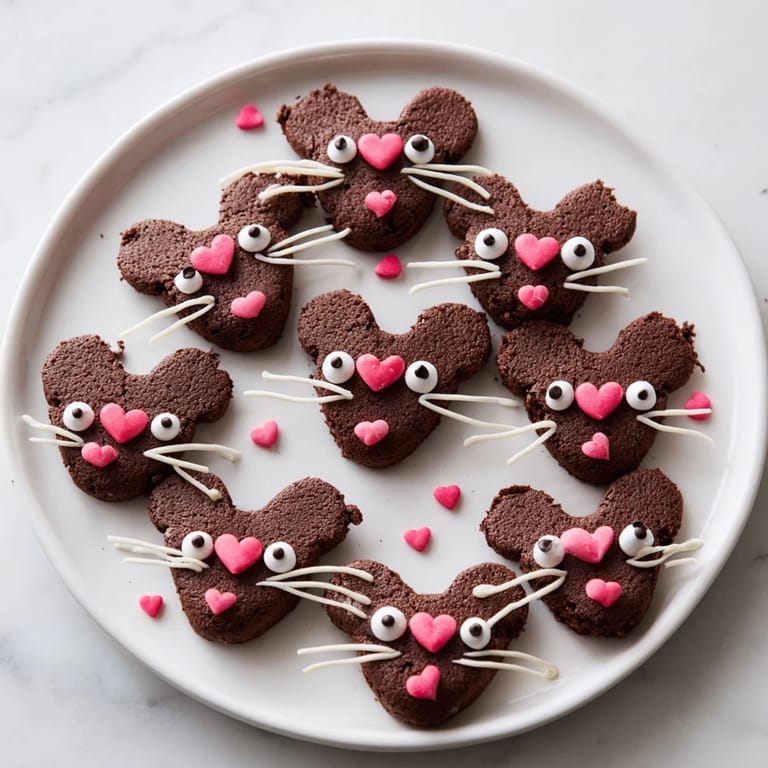
 Adorably whimsical brownie bites inspired by the viral rat cake chaos cakes trend—rich, fudgy chocolate treats decorated to look like playful little rats, perfect for parties and fun gatherings.
My first attempt at making silly rat cake brownie bites was a hilarious kitchen adventure. The decorating process made for lots of laughs, and each little rat came out with its own personality. Kids loved helping to add ears and tails, turning a simple baking project into an unforgettable family memory.
Ingredients
- Unsalted butter: 115 g (1/2 cup), melted
- Granulated sugar: 150 g (3/4 cup)
- Brown sugar: 90 g (1/2 cup)
- Eggs: 2 large
- Vanilla extract: 1 tsp
- Unsweetened cocoa powder: 60 g (2/3 cup)
- All-purpose flour: 65 g (1/2 cup)
- Baking powder: 1/2 tsp
- Salt: 1/4 tsp
- Dark chocolate chips: 90 g (1/2 cup)
- White chocolate: 100 g (3.5 oz), melted for piping
- Pink and black gel food coloring: for tinting details
- Mini chocolate chips: 32, for eyes
- Pink heart sprinkles or pink M&M minis: 16, for noses
- Slivered almonds or sliced jelly candies: 32, for ears
- Licorice laces or spaghetti candy strands: 16, for tails
Tired of Takeout? 🥡
Get 10 meals you can make faster than delivery arrives. Seriously.
One email. No spam. Unsubscribe anytime.
Instructions
- Prepare the pan:
- Preheat oven to 175°C (350°F). Line a 16-cup mini muffin tin or silicone mold with nonstick spray or mini liners.
- Make the brownie batter:
- In a microwave-safe bowl, melt the butter. Stir in granulated sugar and brown sugar until fully combined.
- Mix wet ingredients:
- Whisk in eggs and vanilla extract until mixture is smooth and glossy.
- Combine dry ingredients:
- Sift cocoa powder, flour, baking powder, and salt into the bowl. Stir until just combined.
- Add chocolate chips:
- Fold dark chocolate chips gently into the batter.
- Fill muffin cups:
- Divide batter evenly among muffin cups, filling each about three-quarters full.
- Bake:
- Bake for 18 to 20 minutes, until set and a toothpick comes out with moist crumbs. Cool in pan 10 minutes, then transfer to rack to cool completely.
- Decorate each brownie:
- Tint melted white chocolate with pink gel coloring for noses and ears. Pipe dot for nose, two for cheeks, fine lines for whiskers and tails using piping bag or toothpick.
- Add features:
- Press two mini chocolate chips for eyes, pink sprinkle or M&M for nose, and slivered almonds or jelly slices for ears.
- Finish with tails:
- Insert licorice lace or candy strand for rat's tail. Allow chocolate to set before serving.
 Save to Pinterest
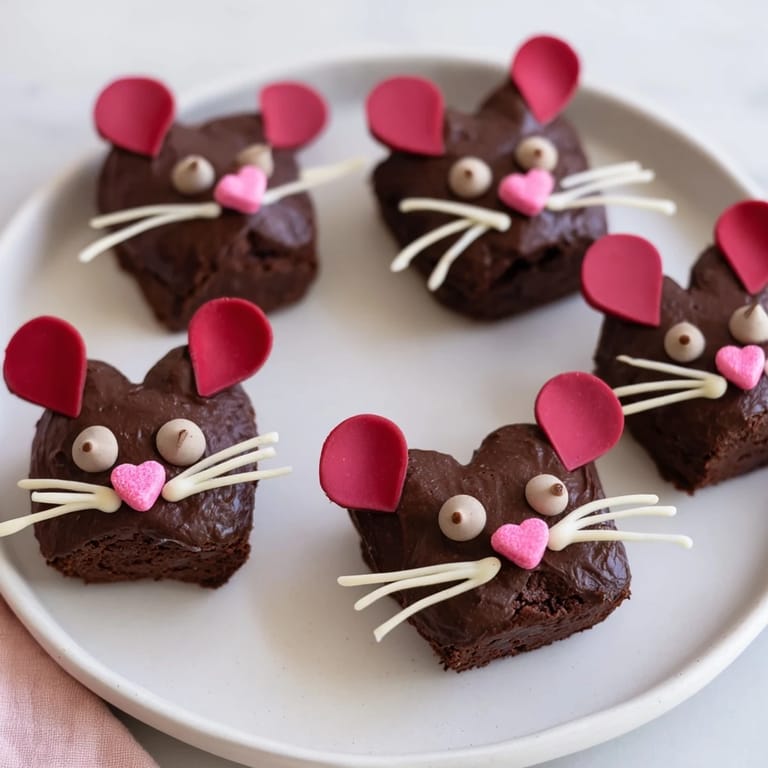
 Decorating silly rat cake brownie bites quickly became a family tradition. Everyone gets excited to create their own little rat, watching the tails and silly faces come together. The finished treats always spark laughter at our party table.
Required Tools
Mini muffin tin or silicone mold, mixing bowls, whisk and spatula, microwave or stovetop, piping bag or toothpicks, cooling rack.
Allergen Information
Contains milk, eggs, wheat (gluten), and nuts if using almonds. Always check candy packaging and decorative items to ensure safety for allergies and dietary needs.
Nutritional Information
Per brownie bite: Calories 130, Total Fat 6 g, Carbohydrates 18 g, Protein 2 g.
 Save to Pinterest
 Share these silly rat cake brownie bites for joy at any gathering. Make them truly your own with playful decorations and creative candy combinations!
Recipe FAQs
- → What type of chocolate works best for the brownie bites?
Dark chocolate chips lend a rich, fudgy texture and deep cocoa flavor, enhancing the moistness and taste of the brownie bites.
- → How can I create the rat features on the bites?
Use melted white chocolate tinted with gel coloring to pipe noses, cheeks, whiskers, and tails. Mini chocolate chips and candy pieces form eyes, ears, and noses for charming details.
- → Can these brownie bites be made gluten-free?
Yes, substitute the all-purpose flour with a gluten-free flour blend to accommodate dietary needs without compromising texture.
- → What’s the best way to bake these treats evenly?
Use a mini muffin tin or silicone mold and fill each cup about three-quarters full. Bake at 350°F for 18–20 minutes, checking doneness with a toothpick.
- → How can I store these brownie bites after baking?
Allow the decorated bites to set fully, then store them in an airtight container at room temperature for up to three days or refrigerate to extend freshness.
- → Can I customize the decorations for different occasions?
Absolutely! Use sugar pearls, colored icing, marzipan, or different candies to adapt the whimsical design to suit holidays or themes.