 Save to Pinterest
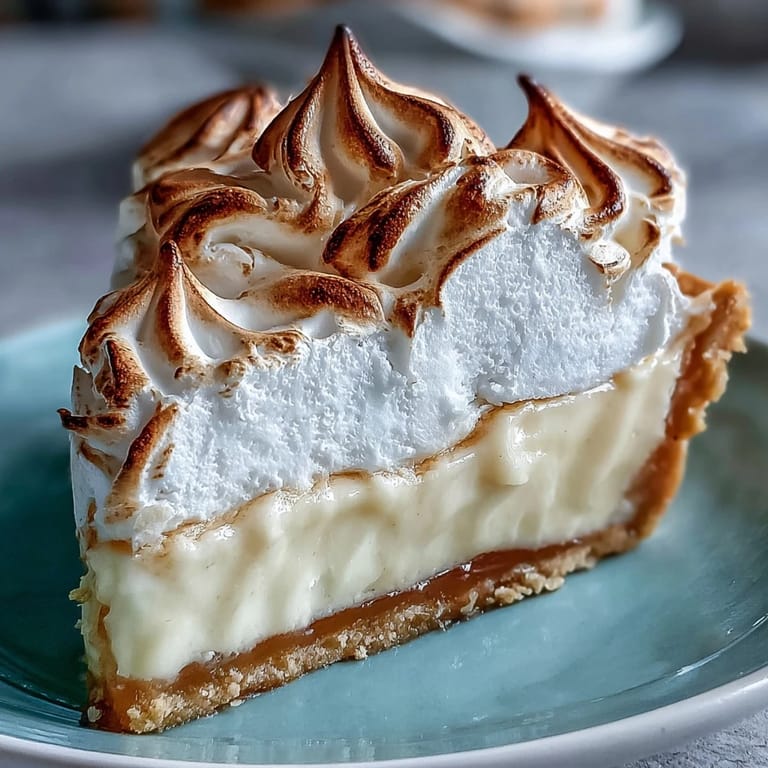
 There's something about the sound of a fork pricking pastry that makes you feel like you actually know what you're doing in the kitchen. My aunt taught me lemon meringue pie during one of those sweltering summer afternoons when the air conditioning had given up, and she insisted we make something that tasted like sunshine anyway. The first time I pulled that golden crust from the oven, I couldn't believe I'd made it without completely botching the dough. Then came the filling, bright and sharp enough to wake you up, and finally that cloud of meringue that transforms the whole thing into something almost too beautiful to eat. Almost.
I made this pie for a potluck where I was certain someone else would bring something better, and instead I watched people come back for thirds. My neighbor actually asked for the recipe right there in the kitchen, which felt like winning an unspoken competition. That meringue on top, piled high and golden, somehow made everyone brave enough to try something homemade instead of just grabbing from the store shelf.
Ingredients
- All-purpose flour: The foundation of everything; I learned to always measure by weight if you have a scale, because scooping straight from the bag compacts it and throws off your proportions.
- Cold unsalted butter: Non-negotiable here because the temperature is what creates those flaky layers, so cut it into small cubes and keep it genuinely cold until the last moment.
- Ice water: Add it slowly and stop as soon as the dough comes together; over-mixing develops gluten and turns your crust tough instead of tender.
- Granulated sugar: For both filling and meringue; the consistency matters more than you'd think.
- Cornstarch: This is what thickens the filling without making it gluey or starchy-tasting if you do it right.
- Egg yolks: Temper them carefully or they'll scramble and ruin the whole filling, which I learned the hard way.
- Freshly squeezed lemon juice: This is where you can taste the difference immediately; three to four regular lemons or two Meyer lemons if you want something gentler and more floral.
- Lemon zest: Use a microplane grater to get the fine bits without the bitter white pith underneath.
- Egg whites: Bring them to room temperature so they whip up to their fullest, glossiest potential.
- Cream of tartar: This stabilizes the meringue and prevents it from collapsing or weeping after baking.
Tired of Takeout? 🥡
Get 10 meals you can make faster than delivery arrives. Seriously.
One email. No spam. Unsubscribe anytime.
Instructions
- Build your crust foundation:
- Whisk together flour, salt, and sugar, then cut the cold butter into the flour mixture until it looks like coarse breadcrumbs. The little butter pieces are what steam in the oven to create layers, so don't work too hard here or you'll destroy that texture.
- Bring the dough together gently:
- Add ice water one tablespoon at a time, mixing with your fingers just until the dough holds together without being wet or sticky. Wrap it in plastic and chill for at least an hour because cold dough is less likely to shrink and tear when you roll it out.
- Roll and blind bake:
- On a lightly floured surface, roll the chilled dough to fit your 9-inch pie dish, then prick the bottom with a fork to prevent puffing. Line it with parchment paper and fill with pie weights or dried beans, then bake at 400°F for 15 minutes before removing the weights for another 8 to 10 minutes until the crust is golden and crisp.
- Create the lemon filling:
- Whisk sugar, cornstarch, and salt together, then gradually add water while whisking to avoid lumps. Cook over medium heat, stirring constantly, until the mixture thickens and starts to bubble around the edges, which takes about 5 to 7 minutes and is when you know the cornstarch has done its job.
- Temper and finish the filling:
- Whisk egg yolks in a separate bowl, then slowly pour in a little of the hot mixture to raise their temperature gradually without cooking them into scrambled eggs. Whisk the tempered yolks back into the saucepan, cook for 2 more minutes, then stir in lemon zest, lemon juice, and butter until everything is smooth and glossy.
- Whip the meringue:
- In a clean bowl with clean beaters, beat egg whites and cream of tartar on high speed until soft peaks form, then gradually add sugar while beating until you have stiff, glossy peaks. This usually takes 5 to 7 minutes and you'll know it's right when the meringue looks impossibly fluffy and shiny.
- Assemble and seal:
- Spread the meringue over the warm filling, making sure to seal the edges all the way to the crust so it won't shrink away during baking. Create peaks and swirls with the back of a spoon if you want it to look fancy, or keep it smooth; either way, the important part is that seal.
- Bake until golden:
- Bake at 350°F for 15 to 18 minutes until the meringue is lightly golden brown on top. Let it cool completely to room temperature, then chill for at least 2 hours before slicing so the filling sets properly and you get clean cuts instead of a messy slide.
 Save to Pinterest
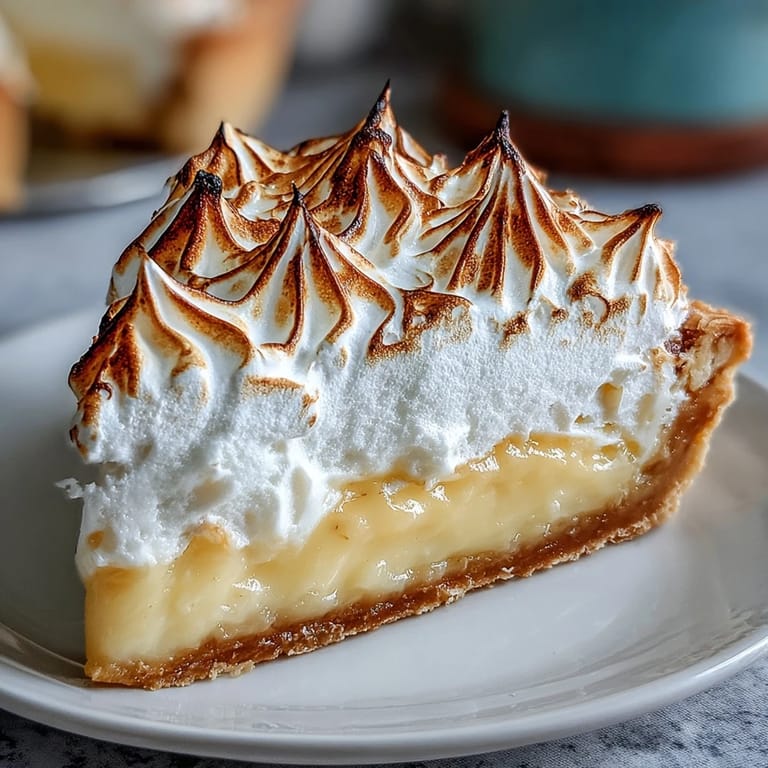
 There was a moment when I pulled that pie from the oven and the meringue caught the late afternoon sun through the kitchen window, and it looked like something from a magazine. My daughter, who usually refuses homemade desserts in favor of store-bought brownies, actually asked for a slice before anyone else could claim one. That's when I realized this pie had become more than just a recipe; it was proof that sometimes the things worth making take time and care and a willingness to look a little foolish while learning.
Why the Crust Matters Most
The crust is honestly where most people either succeed or stumble, and I've done both. A properly made crust should be buttery and crisp and golden, not dense or greasy or tough. The secret is keeping everything cold and not overworking the dough, which goes against every instinct that tells you to knead and mix and make it smooth. I've learned to stop myself just as soon as the dough comes together, even when it looks slightly shaggy, because that's when you've won.
The Filling Technique That Changes Everything
Tempering the egg yolks is the step that intimidates people the most, but it's really just asking the eggs to warm up gradually instead of suddenly cooking hard. You're pouring hot filling into the yolks slowly, stirring as you go, so the temperature rises steadily and the yolks become part of the sauce instead of scrambling into little chunks. Once you've done it once without panicking, it becomes second nature.
Meringue Mastery and Common Mistakes
The meringue is where you see real magic happen if you respect the ingredients and pay attention. Too many people rush it or use equipment that isn't completely clean, and then they watch the meringue refuse to hold peaks or collapse after baking. It's finicky, but only because it's actually quite simple and there's nowhere to hide if you're cutting corners. When it works, when you see those glossy peaks forming, you understand why people have been making this pie the same way for over a hundred years.
- Make sure your bowl and beaters are absolutely grease-free, because even a tiny bit of egg yolk or butter will prevent the whites from whipping properly.
- Add sugar gradually while beating rather than all at once, because this helps it dissolve and keeps the meringue smooth and shiny instead of grainy.
- Spread the meringue on while the filling is still warm so it cooks slightly and seals to the crust, preventing that thin, rubbery layer that forms on top if you put it on cool filling.
 Save to Pinterest
 This pie has become the dessert I make when I want to prove something to myself more than to anyone else. It's patient, it's detailed, and it rewards attention in ways that simpler recipes never quite do.
Recipe FAQs
- → How do I prevent my meringue from weeping?
Spread the meringue over the filling while it's still warm, making sure to seal the edges completely to the crust. This helps prevent moisture from forming between layers.
- → Can I make this pie ahead of time?
Yes, you can prepare the pie up to one day in advance. Store it covered in the refrigerator, but note that the meringue is best within 24 hours of baking for optimal texture.
- → Why is my lemon filling runny?
The filling needs to cook long enough for the cornstarch to fully activate. Make sure it bubbles and thickens properly during cooking, and allow adequate chilling time before slicing.
- → What's the best way to get clean slices?
Chill the pie for at least 2 hours before cutting. Use a sharp knife dipped in hot water and wiped clean between each slice for neat, professional-looking portions.
- → Can I use bottled lemon juice instead of fresh?
Fresh lemon juice is highly recommended for the best flavor and aroma. Bottled juice lacks the brightness and complexity that fresh lemons provide to this classic dessert.
- → How do I store leftover pie?
Cover the pie loosely with plastic wrap or store in an airtight container in the refrigerator for up to 2 days. The meringue may soften slightly over time.