 Save to Pinterest
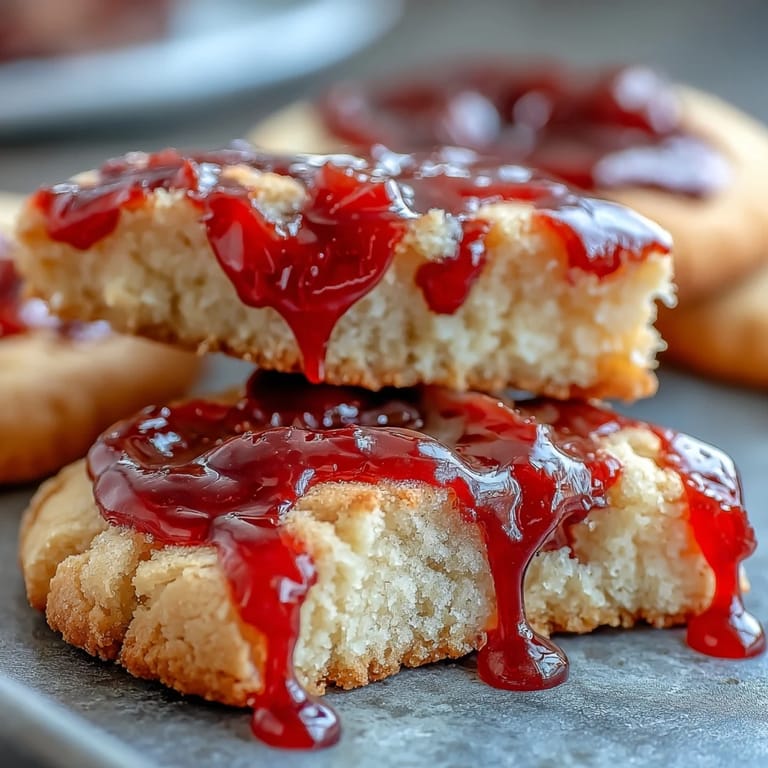
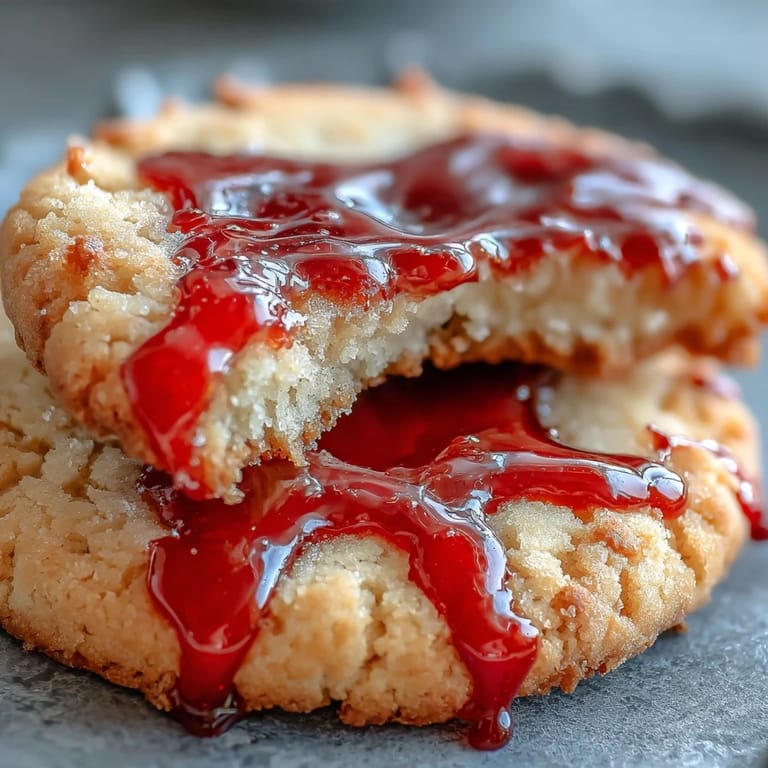
 My nephew burst into the kitchen last October with a magazine clipping of vampire bite cookies, convinced they'd be the scariest treat at his school party. We spent that afternoon poking holes in warm cookies with a chopstick while he narrated each one like a tiny horror movie director, and by the time we drizzled that glossy red icing, even I had to admit the theatrics were oddly perfect. These cookies became our Halloween tradition—soft, buttery, and delightfully dramatic without any of the actual difficulty.
There's something magic about a dessert that makes people laugh the moment they see it. I'll never forget my coworker's face when she bit into one at our office potluck, expecting something scary and finding pure buttery sweetness instead—she actually said it was sneaky in the best way.
Ingredients
- All-purpose flour (2 1/4 cups): This is your structural backbone, and scooping by weight rather than dipping keeps your cookies consistent batch to batch.
- Unsalted butter (3/4 cup): Soft butter is crucial—if it's still cold, your dough fights you, so leave it on the counter while you prep everything else.
- Granulated sugar (1 cup): Creaming this with butter properly takes about 2 minutes and makes the difference between dense cookies and ones that melt on your tongue.
- Egg and vanilla extract: These bind everything and add that rich cookie flavor that makes people ask if you added something special.
- Baking powder and salt: Tiny amounts that do big work—don't skip them or your cookies flatten like sad pancakes.
- Powdered sugar, milk, and corn syrup: The corn syrup is the secret to that glossy, slightly wet blood effect that looks alarmingly realistic.
- Red gel food coloring: Gel colors won't thin out your icing like liquid food coloring does, so you actually get that deep, convincing vampire bite aesthetic.
Tired of Takeout? 🥡
Get 10 meals you can make faster than delivery arrives. Seriously.
One email. No spam. Unsubscribe anytime.
Instructions
- Prep your workspace:
- Preheat to 350°F and line your sheets with parchment—this saves cleanup and prevents sticking. Whisk together your flour, baking powder, and salt in a separate bowl so everything's ready to go.
- Cream the butter and sugar:
- Beat them together until the mixture looks pale and fluffy, about 2 minutes. You'll actually see the transformation, and this step is where half your cookie's texture comes from.
- Add egg and vanilla:
- Mix until combined, scraping down the bowl's sides so nothing gets left behind. The dough will look slightly broken at first, but it comes together once the flour hits it.
- Bring the dough together:
- Add your flour mixture gradually on low speed, and stop the moment everything comes together—overmixing makes tough cookies. You want a soft dough that holds together without being dense.
- Shape and bake:
- Roll tablespoon-sized portions into balls, flatten them slightly with your palm, and space them 2 inches apart. Bake for 10–12 minutes until the edges are just golden—they'll continue firming up as they cool.
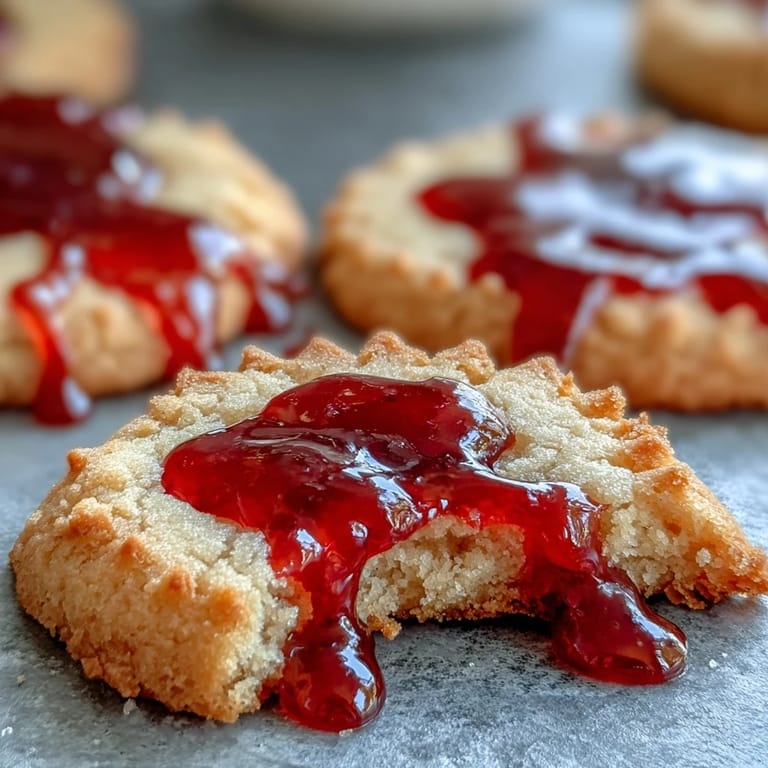
- Create the bite marks:
- Once cooled completely, use the end of a straw or chopstick to gently poke two marks near the edge of each cookie, angling them like fangs hit. Don't press too hard or you'll crack the cookie—think gentle puncture, not destruction.
- Make your blood icing:
- Mix powdered sugar with milk a teaspoon at a time until you get a thick but pipeable consistency. Add corn syrup and red gel coloring, stirring until it's that unsettling deep red that looks just convincing enough.
- Decorate with drama:
- Fill those bite marks with icing using a toothpick or piping bag, letting it drip slightly down the cookie's edge. Optional dark red details add personality, and letting it all set before serving keeps everything looking intentional.
 Save to Pinterest
 My sister brought these to her dental office Halloween party, and the dentists had a full laugh about the irony of vampire bite cookies. By the end of the day, she said people kept coming back not just for how they looked, but because they actually tasted like proper cookies, not just sugar vehicles for decoration.
Dough Temperature Matters More Than You Think
Warm dough spreads too much and your cookies go pancake-shaped; cold dough fights you during shaping. If your kitchen runs warm, chill the dough for 30 minutes before rolling—your future self will thank you when you're not cursing under your breath at sticky balls. I learned this the hard way on a humid August evening when my cookies looked like they'd been run over by a steamroller.
The Icing Consistency Is Everything
Too thick and it won't drip; too thin and it runs everywhere without looking intentional. Start with powdered sugar and add milk literally one teaspoon at a time, testing as you go—this is way easier than trying to fix icing that's already too runny. I've learned that watching it drip off a spoon before committing to baking is the move.
Making Them Your Own
The beauty of these cookies is how easy they are to personalize beyond just the vampire bite theme. Add almond extract for a subtle flavor shift, swap in a gluten-free flour blend if needed, or go wild with the decorative details using different icing colors. These cookies are genuinely just a base for whatever spooky or silly moment you want to create.
- For almond flavor, use 1/4 teaspoon almond extract alongside the vanilla.
- Try piping a small trail of icing from the bite marks for extra theatricality.
- Let icing set completely before stacking or packaging so everything stays picture-perfect.
 Save to Pinterest
 These cookies are proof that baking doesn't have to be complicated to be memorable—sometimes the most fun happens when you embrace a little bit of theatrical nonsense. Whether they're for a Halloween party, a silly office potluck, or just because you wanted to make something that makes people smile, they do exactly that.
Recipe FAQs
- → How do I create the bite marks on the cookies?
Use a straw or the end of a chopstick to gently poke two holes near the cookie edge after cooling to form bite marks.
- → What gives the icing its glossy red appearance?
The icing combines powdered sugar, milk, light corn syrup, and red gel food coloring, with corn syrup adding a shiny finish.
- → Can I prepare the dough in advance?
Yes, chilling the dough for about 30 minutes helps with handling and enhances texture during baking.
- → Are substitutions possible for dietary preferences?
Gluten-free flour blends can replace all-purpose flour, and almond extract may be added for flavor variation.
- → What is the best way to store these cookies?
Store in an airtight container at room temperature to keep cookies soft, or refrigerate if preferred for longer freshness.