 Save to Pinterest
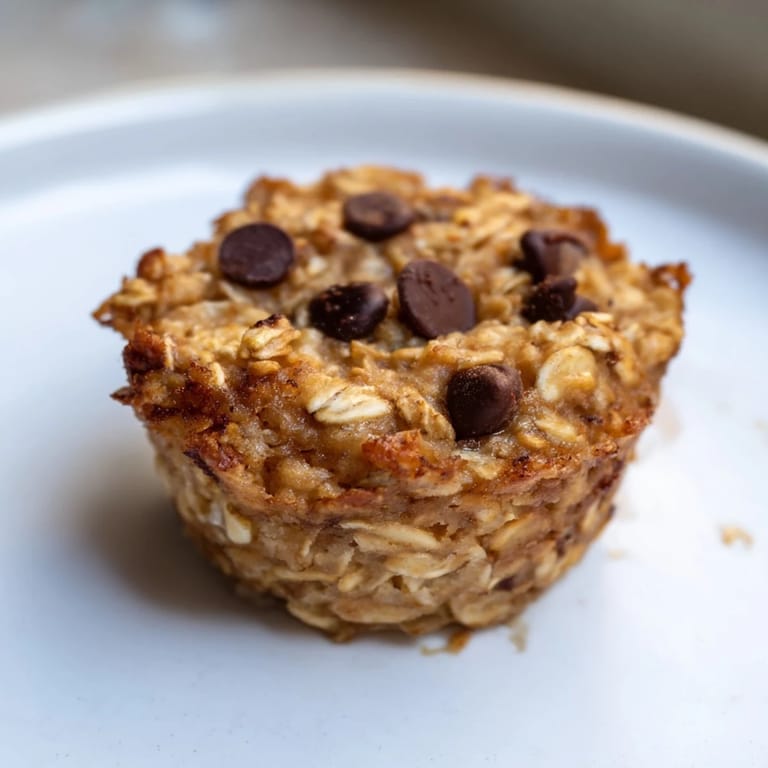
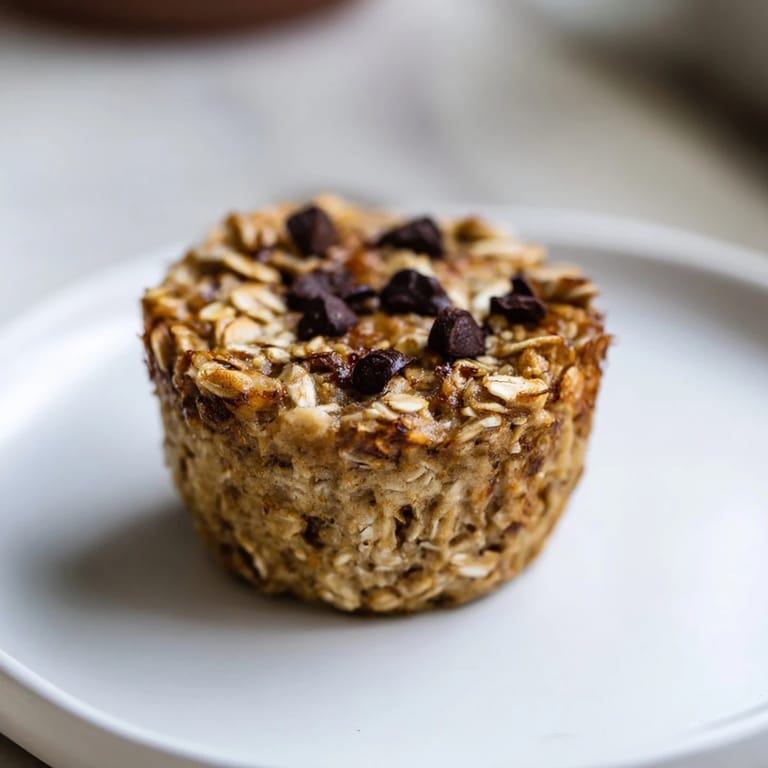
 I discovered these baked oatmeal cups scrolling through my phone at midnight, half-awake, and thought they looked like the kind of breakfast that might actually get me out the door on time. The first batch came together so quickly I almost didn't believe they were real—no overnight soaking, no stovetop stirring, just mix and bake. My kitchen smelled like cinnamon and possibility, and by morning, I had twelve perfect little breakfast packages waiting for me, which felt like winning the lottery in carb form.
I made a double batch on a quiet Saturday and brought them to my friend's place for a casual breakfast before we went hiking, expecting polite comments and leftover cups. Instead, everyone asked for the recipe, and now these somehow became the thing I'm known for bringing to weekend hangouts—which is wild considering how simple they actually are.
Ingredients
- Old-fashioned rolled oats (2 cups): The texture matters here—don't grab instant oats or you'll end up with something closer to oat paste than chewy cups. Certified gluten-free versions work perfectly if you need them.
- Light brown sugar (1/2 cup, packed): This brings moisture and chewiness, not just sweetness, so don't swap for granulated or you'll notice the difference immediately.
- Baking powder (1 tsp): Gives them a subtle lift so they're not dense hockey pucks.
- Ground cinnamon (1/2 tsp): This is your secret weapon—warm spice that makes the whole thing feel intentional, not like you're just eating oatmeal.
- Salt (1/4 tsp): Cuts through the sweetness and makes everything taste more like food and less like a vitamin.
- Large eggs (2): Your binder, but they also add richness that applesauce alone can't deliver.
- Milk (1 1/4 cups): Dairy or plant-based both work; I've used everything from oat milk to the last splash of regular milk and haven't noticed a bad batch yet.
- Unsweetened applesauce (1/4 cup): Adds moisture and a subtle sweetness that keeps you from needing more sugar—also makes the recipe forgiving if you accidentally add more mix-ins than planned.
- Melted coconut oil or unsalted butter (1/4 cup): Coconut oil keeps them dairy-free if you're going that route; butter adds a richness that's hard to argue with.
- Pure vanilla extract (1 tsp): Don't skip this—it ties everything together and makes them taste like something you paid for.
- Optional mix-ins (up to 1 cup total): Frozen berries keep their texture better than fresh, chocolate chips melt just enough to be exciting, and nuts add a satisfying crunch that transforms them from snack to something closer to real food.
Tired of Takeout? 🥡
Get 10 meals you can make faster than delivery arrives. Seriously.
One email. No spam. Unsubscribe anytime.
Instructions
- Heat your oven and prep your tin:
- Get the oven to 350°F while you line a 12-cup muffin tin with paper liners or hit it with nonstick spray. Having everything ready means you're not standing there holding a bowl of batter wondering what comes next.
- Combine the dry foundation:
- In a big bowl, whisk together oats, brown sugar, baking powder, cinnamon, and salt until the mixture looks evenly speckled. This takes two minutes max and ensures the baking powder doesn't clump.
- Build the wet base:
- Crack your eggs into a separate bowl and whisk them together with milk, applesauce, oil or butter, and vanilla until it's smooth and completely combined. You're creating the liquid that'll bind everything together and make them tender, not dry.
- Bring them together:
- Pour the wet mixture into the dry ingredients and stir until just combined—a few small lumps are fine. Overmixing creates a dense texture, which is the opposite of what you want.
- Add your personality:
- Fold in your mix-ins gently, whether that's berries, chocolate chips, nuts, or whatever you've decided should happen here. This is where your morning cups stop being basic and become yours.
- Fill the cups:
- Divide the batter evenly among the muffin cups, filling each almost to the top. Use a small spoon or ice cream scoop to avoid the uneven, sad-looking cup situation.
- Bake until they're golden:
- Pop them in the oven for 23 to 27 minutes—they should smell amazing and the tops should look set and lightly golden. Check at 23 minutes because every oven has moods.
- Cool with patience:
- Let them sit in the pan for 5 minutes so they firm up, then turn them out onto a wire rack. Trying to move them too soon is how you end up with oatmeal cup casualties.
 Save to Pinterest
 There's something quietly satisfying about opening your fridge on a busy morning and finding exactly what you need waiting, already done. These cups turned into my solution for the daily question of what to eat when I don't have time to think about it, and somehow that freedom—just grabbing breakfast without negotiation—became the whole point.
Storage and Make-Ahead Magic
These live comfortably in an airtight container in the fridge for up to five days, which is long enough to power through most weeks without needing a second batch. I've frozen them successfully for up to two months, and they thaw on the counter or in the microwave—just warm them briefly before eating to bring back the soft, chewy texture that makes them worth making in the first place. The real trick is not eating them all before day three, which is harder than it sounds.
Customization Without Limits
The base recipe is honestly just a starting point—I've made versions with cardamom and pear, others with maple syrup swirled in, and once I added everything bagel seasoning to half a batch because I was curious and had the ingredients on hand. You can add spices like nutmeg or swap the applesauce for mashed banana if you want something different, and they'll still turn out fine. This flexibility is part of what makes them such a reliable weekday breakfast.
Making Them Work for Every Diet
For vegan versions, swap the eggs for flax eggs (2 tablespoons ground flaxseed plus 5 tablespoons of water, mixed and left to sit for five minutes), use plant-based milk, and switch to coconut oil instead of butter. If you need them gluten-free, certified gluten-free oats are a straightforward swap that works every time. Everyone at your table—whether they're avoiding dairy, eggs, or gluten—can eat the same breakfast, which is kind of the whole appeal.
- Always check labels on ingredients for hidden allergens if anyone eating these has sensitivities.
- The recipe adapts beautifully to whatever dietary restriction shows up in your life.
- Make a few different batches at once with different mix-ins so everyone has their favorite waiting.
 Save to Pinterest
 These cups became the breakfast I didn't know I was looking for—simple enough to make without thinking, good enough to keep coming back to. They're proof that sometimes the best kitchen discoveries come from watching your phone at the right moment, and then actually trying the thing instead of just scrolling past.
Recipe FAQs
- → Can I make these oatmeal cups vegan?
Yes, swap the eggs with flaxseed eggs (2 tbsp ground flaxseed mixed with 5 tbsp water) and use plant-based milk and oils instead of dairy.
- → What mix-ins work best in these oatmeal cups?
Fresh or frozen berries, mini chocolate chips, chopped nuts, raisins, and dried cranberries add great flavor and texture varieties.
- → How should I store leftover oatmeal cups?
Store them in an airtight container in the refrigerator for up to 5 days or freeze for up to 2 months for longer preservation.
- → Can I prepare these cups in advance?
Yes, they are perfect for meal prep. Bake ahead and keep refrigerated or frozen to enjoy whenever needed.
- → Are these oatmeal cups gluten-free?
Use certified gluten-free rolled oats to ensure the oatmeal cups are safe for a gluten-free diet.