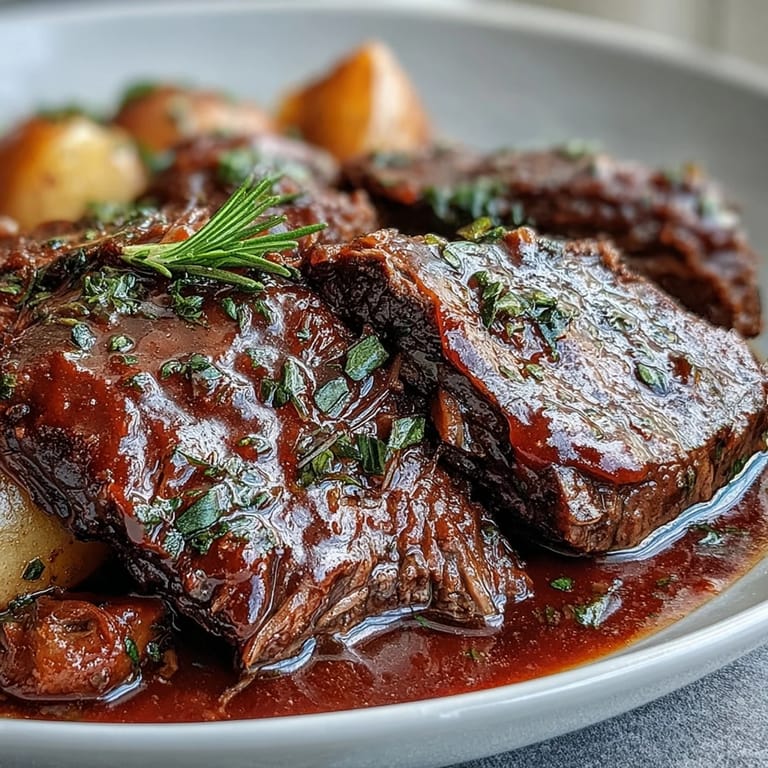
 Save to Pinterest
 The first time I made pot roast, I was hosting a Sunday dinner for friends and had no idea what I was doing. I tossed everything in the oven at noon and prayed, checking the pot every twenty minutes like a nervous parent. By the time everyone arrived, the house smelled like heaven, and that roast was so tender it practically fell apart when I tried to carve it. Now it's my go-to for lazy weekends when I want something that tastes like I spent all day cooking but actually lets me binge-watch shows while it braises.
Last February, during that snowstorm that trapped us inside for three days, I made this pot roast with whatever I had in the pantry. My neighbor came over with a bottle of red wine she could not open herself, and we ended up eating this straight from the Dutch oven on my living room floor. The beef was falling apart, the vegetables were sweet and soft, and we talked for hours while the fire died down. That night turned into a weekly tradition, and honestly, the roast was just an excuse to get together.
Ingredients
- Beef chuck roast: Well-marbled is non-negotiable here because the fat melting into the braising liquid creates all that flavor
- Kosher salt and black pepper: Season generously before searing because this is your only chance to season the meat itself
- All-purpose flour: Creates that gorgeous brown crust and helps thicken the gravy later
- Olive oil and butter: The combination prevents burning while giving you that rich buttery flavor foundation
- Yellow onion: Thick wedges hold their shape better than diced and become meltingly sweet after hours
- Garlic: Smashed cloves release their flavor more gently into the braising liquid
- Carrots and celery: Cut into large chunks so they do not turn to mush during the long cook time
- Baby potatoes: Small waxy potatoes stay intact better than russets and soak up all that braising liquid
- Tomato paste: Caramelize it until it darkens to develop deep umami notes
- Dry red wine: Use something you would actually drink because the alcohol cooks off but the flavor remains
- Beef broth: Low-sodium gives you control over the final seasoning
- Worcestershire sauce: Adds that subtle savory depth that makes people ask what your secret ingredient is
- Fresh rosemary and thyme: Woody herbs hold up to long cooking unlike delicate basil or cilantro
- Bay leaves: Throw them in whole and fish them out before serving
Tired of Takeout? 🥡
Get 10 meals you can make faster than delivery arrives. Seriously.
One email. No spam. Unsubscribe anytime.
Instructions
- Get the oven ready:
- Preheat to 300°F if using the oven method, though honestly a stovetop simmer works just as well
- Prep the beef:
- Pat the roast completely dry with paper towels because moisture is the enemy of good browning
- Season and coat:
- Salt and pepper all sides generously, then dust with flour and shake off the extra
- Sear hard:
- Heat oil and butter in your Dutch oven until shimmering, then brown the roast for 4-5 minutes per side until it has a deep crust
- Build the base:
- Cook the onion wedges in the same pot until they are golden and fragrant, then add garlic for just a minute
- Deepen the flavor:
- Stir in the tomato paste and let it cook until it turns rusty brown and smells incredible
- Deglaze the pot:
- Pour in the wine and scrape up every browned bit from the bottom because that is where the flavor lives
- Add the liquid:
- Pour in the beef broth and Worcestershire, then nestle the roast back in so it is half-submerged
- Add the herbs:
- Tuck in the rosemary, thyme, and bay leaves like you are tucking it into a cozy blanket
- The long wait:
- Cover tightly and cook for 1.5 hours before checking
- Add vegetables:
- Flip the roast and arrange the carrots, celery, and potatoes around it in the liquid
- Finish braising:
- Cook again for 1.5-2 hours until the beef yields easily when you poke it with a fork
- Rest everything:
- Move the roast and veggies to a platter and cover with foil while you deal with the gravy
- Thicken if desired:
- Simmer the liquid and whisk in the cornstarch mixture until it coats the back of a spoon
- Carve and serve:
- Shred or slice the beef against the grain, arrange everything on a platter, and drown it in that gravy
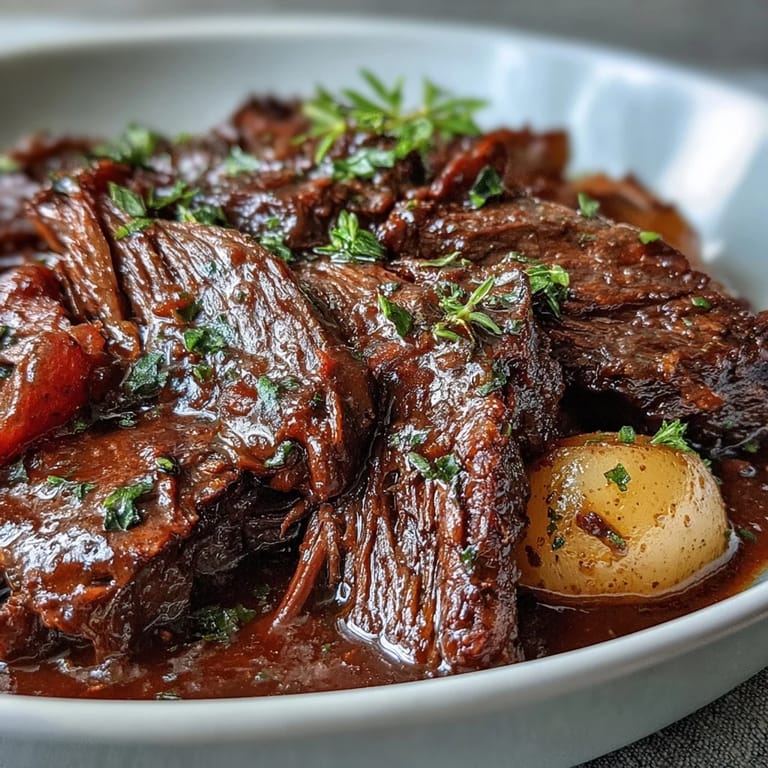 Save to Pinterest
 My dad claims he does not care much about food, but the first time he tasted this pot roast, he went back for thirds without saying a word. He later told me it reminded him of his mother is Sunday suppers, which is the highest compliment I could ever hope to receive. Now he requests it every time he visits, and I have learned to make extra because he inevitably leaves with containers stacked in his car.
Making It Your Way
I have made this in a slow cooker when I knew I would be out all day, and honestly, it is almost foolproof. The searing step still matters, so do not skip it even if you are using a crockpot. The vegetables get softer this way, but sometimes that is exactly what you want.
What To Serve With It
Crusty bread is non-negotiable in my house because someone needs to sop up that gravy. Buttered noodles or mashed potatoes work too, and a simple green salad with sharp vinaigrette cuts through all that richness.
Storing And Reheating
This might be the only thing that improves overnight as all those flavors meld together. Store everything in the gravy so nothing dries out, and reheat gently on the stovetop with a splash of broth.
- The flavor is even better if you make it a day ahead
- Freeze portions with extra gravy for emergency comfort meals
- The leftovers make incredible tacos or sandwiches
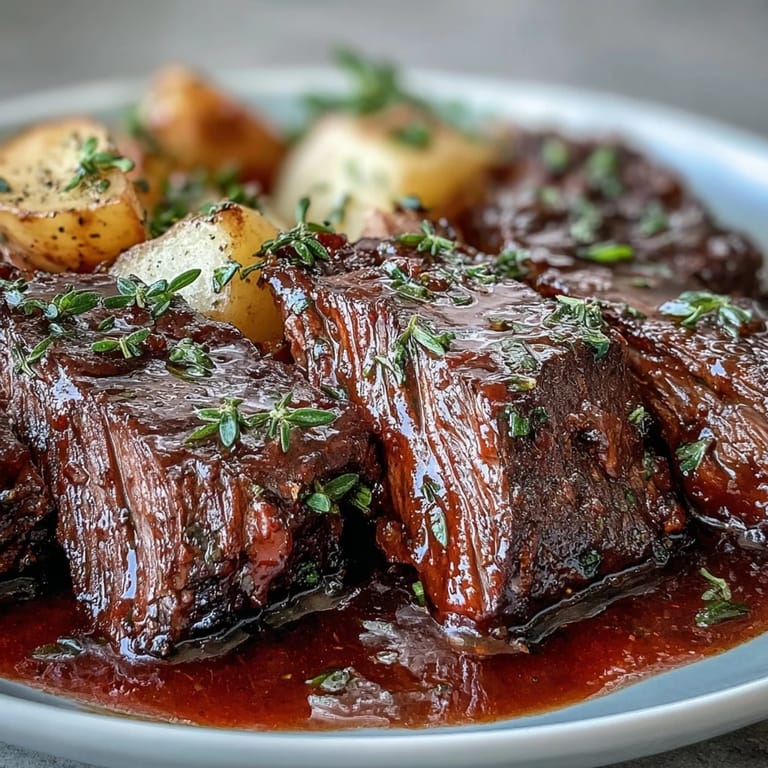 Save to Pinterest
 There is something deeply satisfying about a dish that rewards patience with such incredible flavor. Hope your kitchen smells as wonderful as mine always does.
Recipe FAQs
- → What's the best cut of beef for a succulent pot roast?
For the most tender and flavorful results, use a well-marbled beef chuck roast or blade roast. These cuts have enough fat and connective tissue to break down during slow braising, yielding incredibly juicy and fork-tender meat.
- → How do I achieve truly fork-tender beef?
The secret lies in slow, gentle braising. After searing the beef to lock in flavor, it needs to cook for several hours at a low temperature, either on the stovetop or in the oven, submerged in liquid. This allows the connective tissues to transform into gelatin, making the beef wonderfully tender.
- → Can I make this without red wine?
Absolutely. If you prefer to avoid alcohol, simply substitute the red wine with an equal amount of additional low-sodium beef broth. You'll still achieve a rich depth of flavor from the other aromatics and the long braising process.
- → When should I add the vegetables to ensure they don't get mushy?
For optimal texture, add the carrots, celery, and potatoes about halfway through the total braising time. This allows them to cook until tender but still hold their shape, rather than becoming overly soft or disintegrating.
- → How can I thicken the gravy if it's too thin?
After removing the beef and vegetables, bring the braising liquid to a simmer. You can then whisk in a cornstarch slurry (cornstarch mixed with cold water) and cook for a few minutes until the sauce reaches your desired thickness. Add more slurry as needed.
- → Is this dish good for meal prepping or leftovers?
Yes, it's an excellent choice for leftovers! Many find the flavors deepen and improve overnight. Store any remaining portions in an airtight container in the refrigerator for 3-4 days. It reheats beautifully.